Archive
Resetting a Xylan OmniStack 4024CF to the Factory Defaults
The Xylan OmniStack 4024CF is probably not a bad little switch – I was given one for free from my brother-in-law, so I figured I would at least try it out. 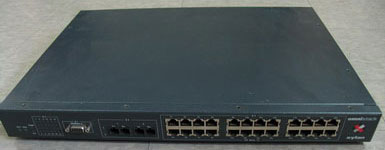 As with all “smart” switches, though, before this new device could be used in my network, I had to reset it to its factory defaults since I had no idea what the password was for the admin login.
Nothing is ever as easy as it should be, and this venture was no exception. It should be as simple as plugging a computer into the CONSOLE of the switch and interrupting the boot process, right? The short answer is, yes, it is that simple. What makes things a bit more difficult is actually doing that when you are using a Dell laptop that does not have a serial port and is running Microsoft’s Windows Vista.
Challenge #1 was the lack of a serial port on my Dell laptop. To get around this problem, I bought myself a USB to Serial connection from Belkin (Belkin F5U409). I plugged this in, Vista detects it and wants to load new drivers for the device, but cannot find any to install. A quick trip to Belkin’s support site does the trick here. A driver install and reboot later, and the serial connection is up and running.
Challenge #2 was more of a surprise. Needing to have terminal emulation, I went to start up HyperTerminal and what do I discover but Microsoft has decided that Vista has no need for HyperTerminal. Now this would usually not be that big a snag, seeing as how I use PuTTY for all of my other Telnet/SSH needs and the latest version of the software has a serial connection option. The problem with this was that the boot process was not being detected by the serial connection from within the PuTTY client, so there was no way to interrupt the process. I had to search for a terminal emulator that would detect the boot process.
The original HyperTerminal was licensed by Microsoft from a company called Hilgraeve, and the software is still available through them, though it is only free for personal use. Now, for setting up this particular switch, it is for home use, but I had the feeling this would not be the last time I had need of a terminal emulator, and should it be needed for work, I did not want to worry about licensing issues. My option, then, was to find an open-source software solution. That was when I discovered the open-source software Poderosa, which is a tabbed terminal emulator for Windows. I simply downloaded this software, plus the serial port connection plugin available for it, and I was finally in business.
The first step in the process for resetting the router to the factory default is to interrupt the boot process when prompted to do so:
Flash file system check in progress...
   Checking root file system...   OK
   Performing file consistency check...
   Done.

FFS     Id:1d5  Sectors:16      Size:4194304
Bootline configuration not set, using default values

                     System Boot

Press any key to stop auto-boot...
 1
Then you must enter into the Boot Flags menu by pressing ‘c’ at the Boot: prompt.
[Boot]: c

'.' = clear field;  '-' = go to previous field;  ^D = quit
Simply confirm everything by pressing <Enter> at each of the prompts until you get to the Boot Flags line that reads “Boot Flags : 0xb”. On this line, you must add the reset flag after the ‘0xb’ by typing in the following: ‘0x1000’. After this change, confirm everything else by pressing <Enter> until you are back at the [Boot]: prompt.
Boot device          : ffs <Enter>
Boot file            : /flash/mp4.img <Enter>
Eth IP addr[:mask]   :                <Enter>
SLIP IP addr[:mask]  : <Enter>
Startup script       : /flash/mp4.cmd <Enter>
Console params       : 9600,n81c      <Enter>
Modem params         : 9600,n81  <Enter>
Boot flags           : 0xb 0x1000 <Enter>
Other                : dvip:no-name,192.168.10.1,255.255.255.0,192.168.10.255; <Enter>

[Boot]:
Once you are back at the Boot: prompt, type ‘@’ to load the new configuration and reboot.
[Boot]: @
Resetting system to factory defaults

File system compaction in progress...

File system compaction in progress...

Boot device          : ffs
Boot file            : /flash/mp4.img
Startup script       : /flash/mp4.cmd
Console params       : 9600,n81c
Modem params         : 9600,n81
Boot flags           : 0xb
Other                : dvip:no-name,192.168.10.1,255.255.255.0,192.168.10.255;

Loading /flash/mp4.img...25408 + 1622952 + 314792
Starting at 0x40d00000...

Flash file system check in progress...
   Checking root file system...   OK
   Performing file consistency check...
   Done.

Attaching net i/f  lo0. IP=127.0.0.1 ...done.
Configuring default VLAN hostname no-name at addr 192.168.10.1

Adding 13286 symbols for standalone.
Executing startup script /flash/mp4.cmd ...
cmDoDump=1
_cmDoDump = 0x4046bf90: value = 1 = 0x1
cmInit
0x40fe1930 (tShell): New style config file /flash/mpm.cnf not found, converting...
    Alcatel SNMP Agent Operational.
value = 0 = 0x0

Done executing startup script /flash/mp4.cmd

This product includes software developed by the University of California,
Berkeley and its contributors.

Welcome to the Alcatel OmniStack! Version 3.4.10
login   :
The system will now be reset to the factory default. To log in, use the username ‘admin’, and an initial password of ‘switch’ (at least this is the default for version 3.4.10).
login   : admin
password: [switch]

  **********************************************************************

Alcatel OmniStack
Copyright (c), 1994-2000 Alcatel Internetworking, Inc. All rights reserved.
OmniStack is a trademark of Alcatel Internetworking, Inc.
registered in the United States Patent and Trademark Office.
           System Name:       no-name
    Command      Main Menu
    ------------ --------------------------------------------------------
    File         Manage system files
    Summary      Display summary info for VLANs, bridge, interfaces, etc.
    VLAN         VLAN management
    Networking   Configure/view network parameters such as routing, etc.
    Interface    View or configure the physical interface parameters
    Security     Configure system security parameters
    System       View/set system-specific parameters
    Services     View/set service parameters
    Switch       Enter Any to Any Switching Menu
    Help         Help on specific commands
    Diag         Display diagnostic level commands
    Exit/Logout  Log out of this session
    ?            Display the current menu contents

/ %
Once the % prompt appears, it is then simply a matter of setting the admin password to something more stringent, using the command ‘pw admin’.
The only pains to resetting this switch were in my using a Dell laptop without a serial port and said Dell having Windows Vista installed on it. If it were not for the lack of a software application that could do the terminal emulation I needed, this would have really been a breeze. Perhaps my pain will help someone else out – I can only hope.
Using Windows Installer in Safe Mode
Having to recently put on my desktop support hat, I ran into an issue where installed software had created a brick out of an IBM laptop. I booted into Safe Mode and wanted to uninstall the offending software when I discovered, to my dismay, that I could not access the Windows Installer service from within Safe Mode.
A quick Internet search provided the solution, and that is to edit the registry so that Windows Installer is available. The following are the steps to take in order to start Windows Installer in Safe Mode.
Important! You may want to back up your registry prior to modifying it in any way. Microsoft has support article 322756 showing you how to do this for Windows XP and Windows Vista.
-
Start your computer in Safe Mode by pressing F8 before the Windows splash screen appears.
-
Once logged in, click Start, then Run, and type regedit in the textbox, followed by Enter (or click OK).
-
Locate and click the following registry key: HKEY_LOCAL_MACHINE\SYSTEM\CurrentControlSet\Control\SafeBoot\Minimal
-
Click Edit from the menu, and select New –> Key. The new Key should be named MSIServer.
-
Double-click Default and type Service in the Value data box. Click OK.
-
Close the registry Editor.
-
Restart your computer in Safe Mode, following the information in Step 1.
-
Once logged in, click Start, then Run, and type services.msc in the textbox, followed by Enter (or click OK).
-
Click on Windows Installer, then click Start.
You should now be able to add and remove programs from within Safe Mode.
Just remember that a serious problem might occur if the registry is incorrectly comfigured in any way.
I hope this helps someone.
